
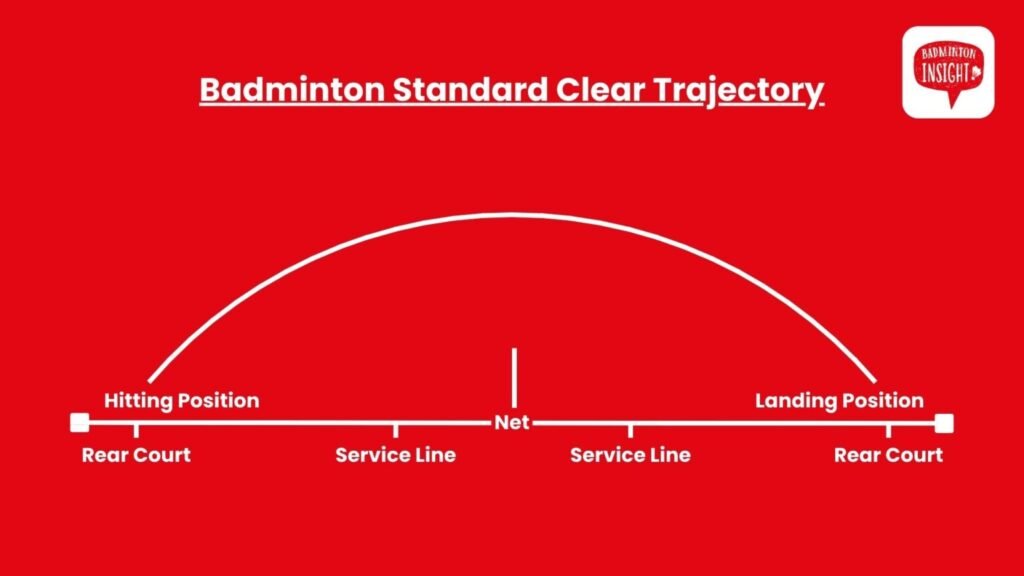
The forehand clear is one of the most basic shots in badminton. The shuttle is hit from the rear court on one side, to the rear court on the other side of the court. You can play different types of clears depending on the situation; a standard clear, defensive clear, or offensive punch clear.
If you’re wondering why you can’t clear with more power it is most likely because of your technique! Many 10 year old girls can clear right to the back of the court…
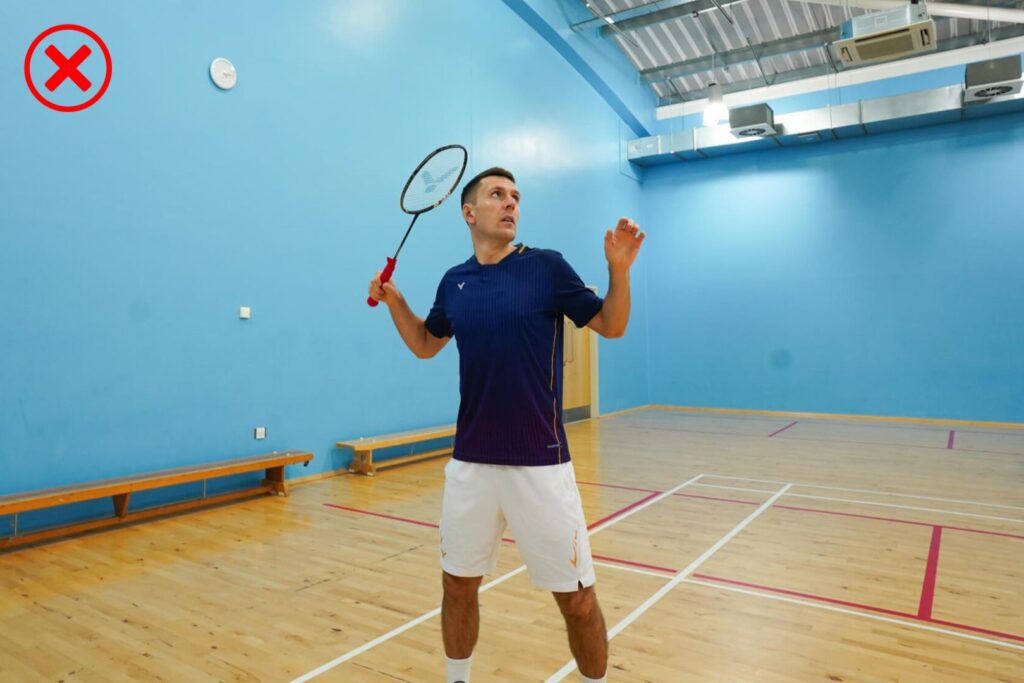
To hit a good forehand clear, have a loose forehand grip, your body facing sidewards and non racket arm up. As you rotate your torso, keep your elbow back, delaying the forward movement of your racket arm. Then as your elbow comes through, bring your wrist through to rotate the forearm and hit the shuttle.
We’ll now go into more detail about:
- The 3 types of clears and when to use them
- The preparation for the forehand clear
- The hitting action for the forehand clear
- Practices you can do to improve your forehand clear
The 3 Types Of Clears And When To Use Them
1. Standard Clear
You should use a standard forehand clear when you need to reset the rally, or to simply move your opponent. This can be especially effective in singles and women’s doubles to help create opportunities and gaps in the court.
It’s important to mention that you don’t want to hit your clear too flat so your opponent can easily intercept it, but you also don’t want to hit it too high as this gives them a lot of time to get behind the shuttle and play their shot!
2. High Defensive Clear
If you are in a lot of trouble, then you hitting your clear with height can be a good option. The high clear is used when you need to give yourself, and your partner if you’re playing doubles, time to recover.
For this high clear you need to bend your wrist back more to hit ‘underneath’ the shuttle and create more height on your shot.
3. Offensive Clear
This is also known as a punch clear and is an attacking shot. It can be used to win points outright or force your opponent to take it really late in the rear court!
The technique for this is a little different to the normal or high clear, and it’s quite an advanced shot. We cover it in a lot more detail here.
In this article, we’ll be going through the technique of how to play a standard clear, which is the most basic type of clear.
Preparation For The Forehand Clear
1. Racket & Grip
You should be in a loose forehand grip, with a ‘V’ shape and a little space between your index finger and middle finger (as shown below). You should also have your hand further down the grip handle to create a longer lever which helps improve your power.
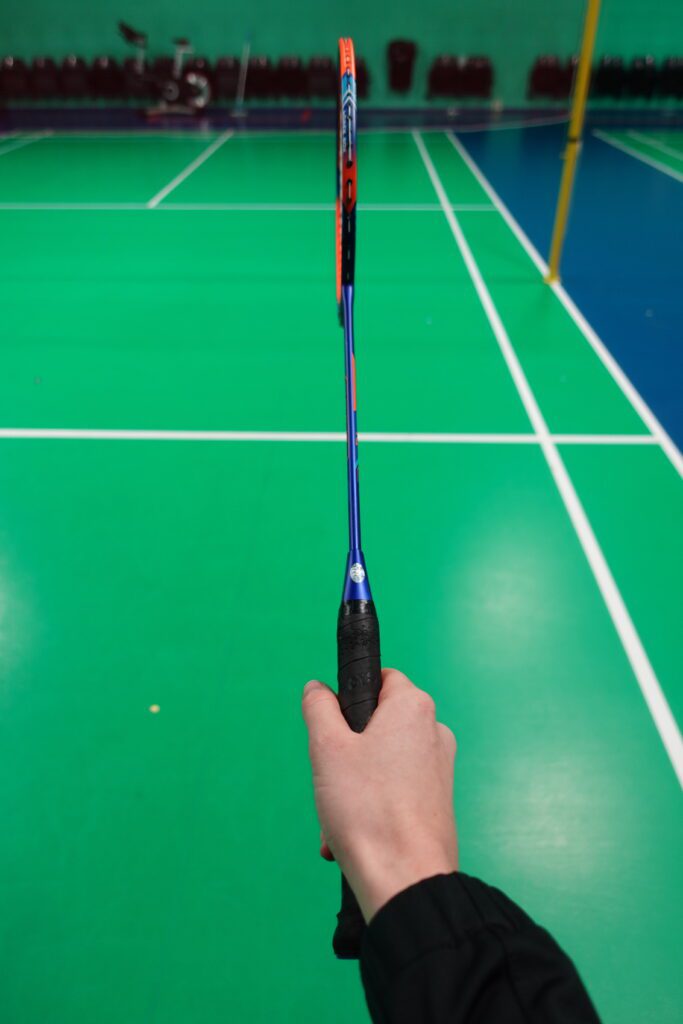
One of the most common mistakes we see is people using a panhandle grip. This is because it’s easier to hit the shuttle this way, BUT it also limits your ability to rotate properly through the shot, which reduces both your power and control… so we don’t recommend it!

2. Footwork
From pretty much wherever you are on the court, you should split step, chassee and then ideally be slightly behind the shuttle.
Depending on your positioning, the 2 most common footwork movements for the clear on the forehand side are:
- A scissor kick movement
- A jump out
The most common footwork movement for the clear on the round-the-head side is:
- A scissor kick movement
3. Body Preparation
For the final stages of the preparation, you should be facing sidewards, with your racket arm having roughly two 90 degree angles, and your non-racket arm up to help with your timing, balance and rotation (as shown below).
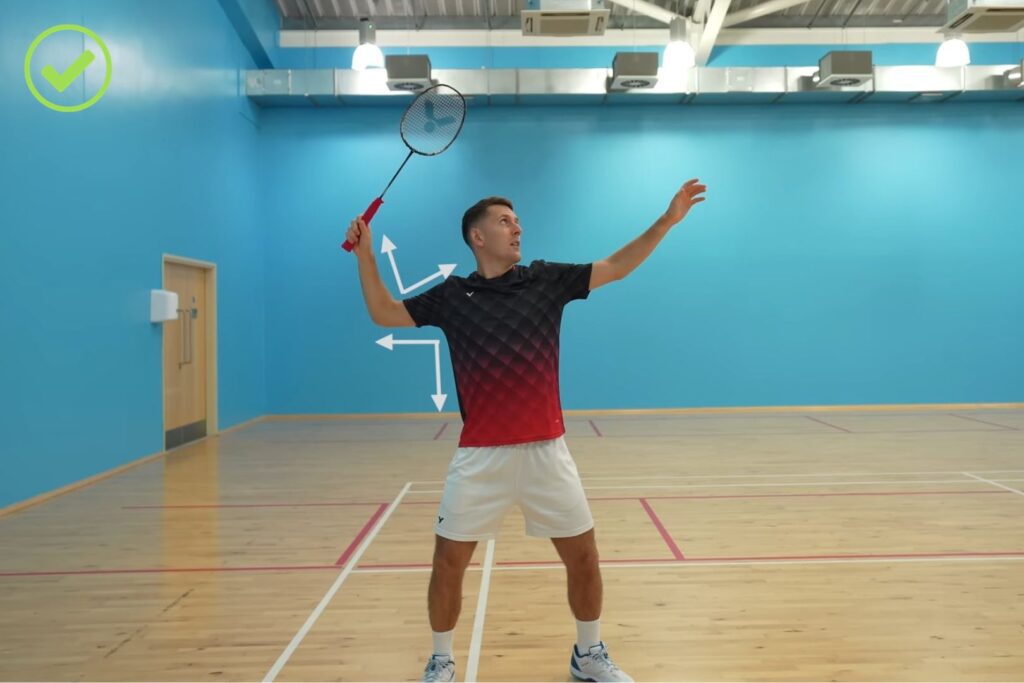
The clear is a shot that requires power as you need to make sure it goes to the back of the court and if your body is really tucked up then you won’t be able to generate the power you need!
Hitting Action For The Forehand Clear
4. Rotation
To maximise the power in your forehand clear, you should rotate your body in a specific order:
- As the shuttle is approaching you, start rotating your torso
- Then rotate your hips
- Then rotate your shoulders
As you are rotating your torso, you should keep your elbow back to delay the forward movement of your racket arm.
This ‘delay’ stretches your chest out, meaning the final movement that pulls the elbow forward is more powerful and your elbow, and therefore racket, comes through faster as a result.
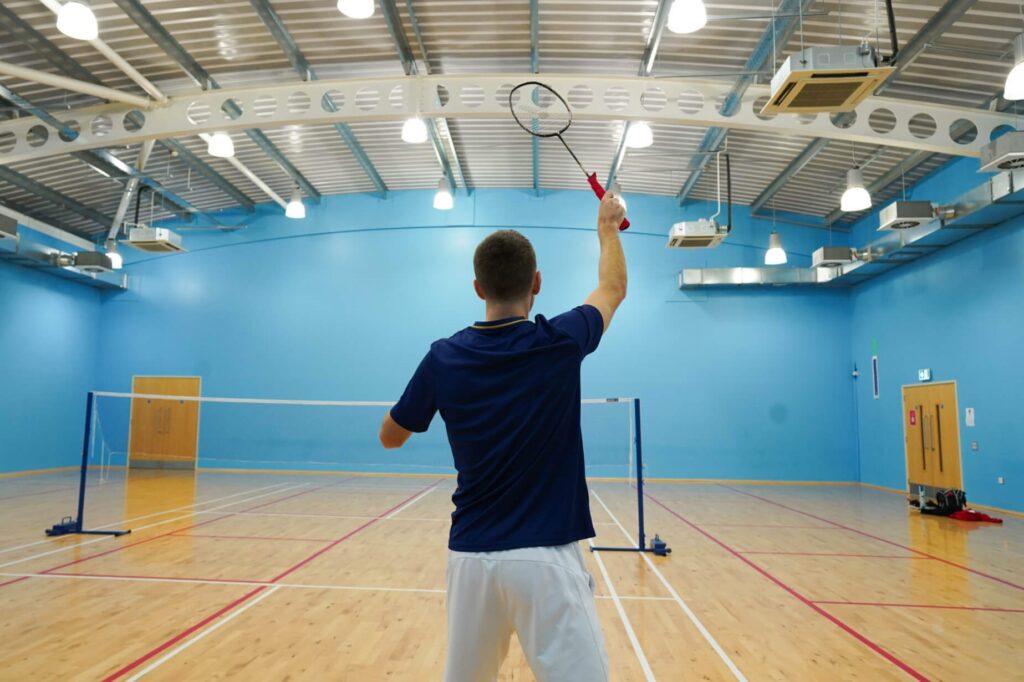
5. Striking The Shuttle
After your elbow comes through, you then bring your wrist through to rotate the forearm and hit the shuttle.
Similar to the smash, the optimal contact point is to strike the shuttle on the forehand clear is around half a meter in front of you.
Here are some other important points when playing the forehand clear:
- If you’re in trouble and end up taking the shuttle slightly later, you won’t be in a good position to rely on the forwards rotation of your body to generate the power needed. Instead, you will need to create more power with your arm and shoulder, especially your elbow and back of the shoulder to hit the shuttle to the back.
- No matter where you strike the shuttle, it’s important to not have your arm too straight OR too bent (which are two common mistakes we see).
- If you have your arm too straight then you’re only using your shoulder to generate power, not your forearm and wrist. And if you have it too bent then you are limiting your rotation which reduces your power! So, having a slightly bent arm is optimal.
Finally, as you strike the shuttle you need to really squeeze the grip as this will further help with power generation.
Practices For The Forehand Clear
1. Throwing A Tennis Ball
If you’re very new to this, we would recommend throwing a tennis ball to practice the technique as we mentioned earlier. You can then swap this for a racket to help get the feeling of the racket head acceleration and grip squeeze, but we still wouldn’t recommend using a shuttle at this stage!
2. One Shuttle At A Time
The next progression is to get someone to high serve up to you and you try to implement the preparation and hitting action that we discussed earlier.
We’d recommend starting by facing sidewards and only practicing the preparation and hitting action, and then progressing to add in some more movement when you feel comfortable/ready.
3. Open Routine Practice
Our third progression is an open routine where you are moving from slightly different positions and are under varying amounts of pressure when playing your clears. You will need a feeder stood one one side of the court clearing back to you. Start off with straight clears whilst moving back towards the centre of the court a little after each shot.
length and height on your clears!
4. Cross Court Clear Practice
Once you are confident with the technique, remember to practice your cross court clears too!
When hitting cross court from a straight shot, your racket face needs to end up facing the direction you want the shuttle to travel. When hitting straight clears from a cross court shot you might need to hit slightly across the shuttle in order to make the shuttle go straight.